Build an Interactive, Realtime Experience
Danger
This tutorial is out of date. Please check the tutorials overview for our latest tutorials.
Aim
This Data Streaming and Processing tutorial will help you build your own realtime interactive creation.
The multiple elements, tools and techniques used in this tutorial will allow you to experience much of what Quix has to offer.
By the end you will have:
-
Created services to process data in realtime
-
Deployed a public facing website with desktop and mobile elements
-
Created an experience you can share with friends and colleagues
Tip
If you need any help, please sign up to the Quix Community.
Application architecture
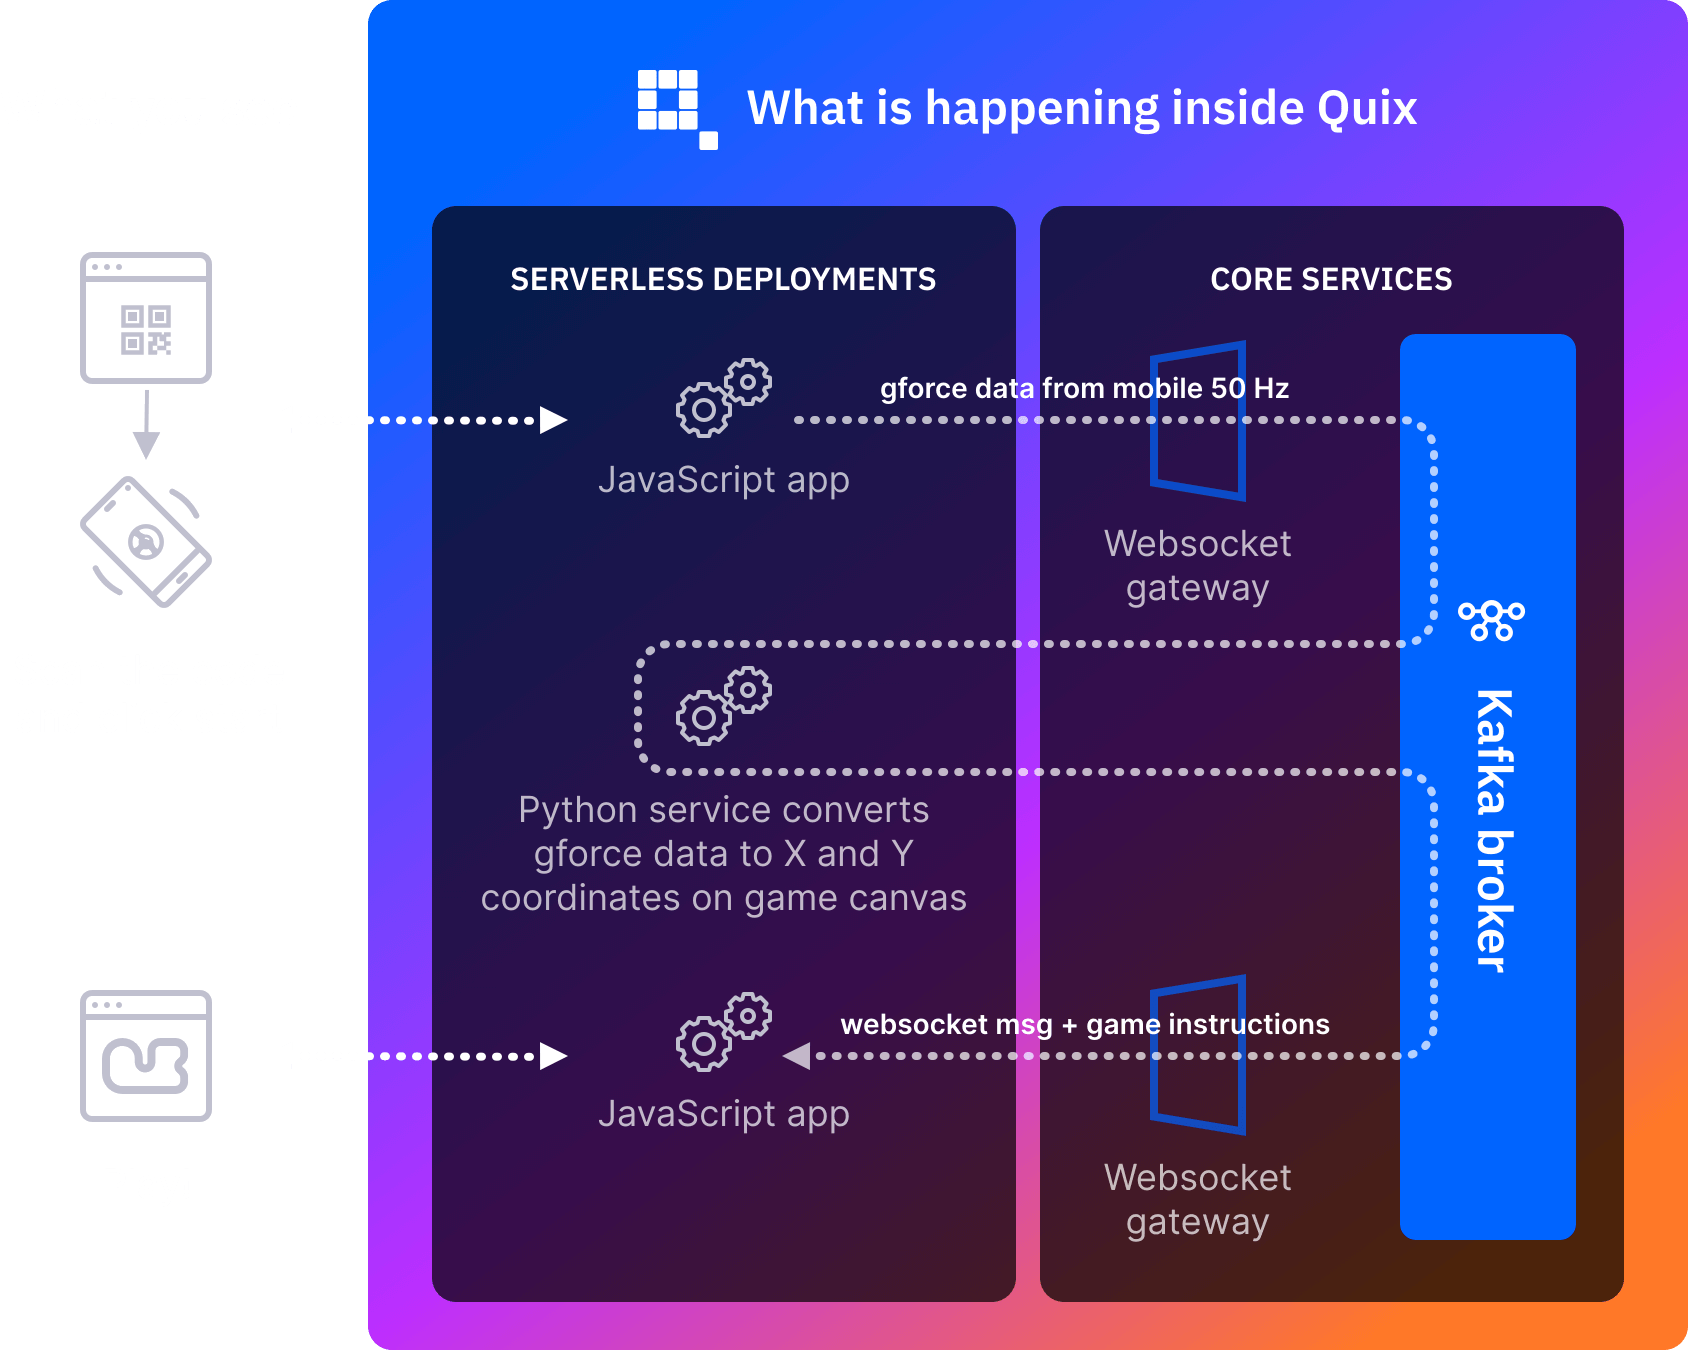
The solution has three main elements:
-
Two services to process data
-
A Node.js UI to display a race track and send data from your mobile device
However, this is all running with the Quix Serverless environment.
You have to create and deploy three applications. Quix has:
- Created an always on high performance back-end
- Created APIs and Services focused on performance
- Opened firewall ports and optimized DNS propagation
Prerequisites
- A Quix account
Start for free
Book a session with us to start for free.
We will create a time-limited free account for you, and our experts will help you get started with your specific use case.
- A mobile device
Overview
This walk through covers the following:
-
Creating the python services and Node.js UI’s
-
Deployment of the above
-
Some fun!
Getting Started
Log in to Quix and open your project, you get one project on the free tier, more on higher tiers. A Quix project is a container to help you manage all the data, topics, models and services related to a single solution so we advise using a new, clean one for this tutorial.
Code Samples
The code you will need for this tutorial is located in the Code Samples.
Navigate to Code Samples and search for Streaming Demo. You will see 3 results.
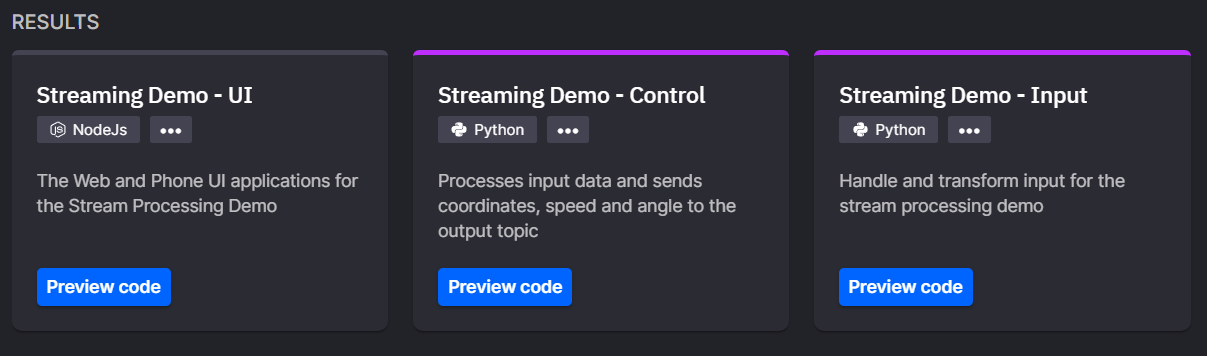
You will save the code for each of these to your environment and deploy the two services and the UI.
Input
First you will select, build and deploy the input application, this application handles and transforms data from your phone.
Don't worry, all the code you'll need is in the Streaming Demo - Input application.
Save the code
Follow these steps to get the code and deploy the application as a microservice.
- Click the tile
-
Click
Edit codeNote
Leave the name, input and output as they are.
The input and output values are Topics. These have been pre-configured in this and the other applications in this tutorial to allow the services to communicate with each other.
-
Click
Save as ApplicationThis will save a copy of this code to your environment.
About the code
The code's main purpose is to listen for and respond in real-time to data and events being streamed to it via the
gamedatatopic.The data is streamed into the
gamedatatopic from your phone.When data is received, the
on_parameter_data_handlercallback is immediately triggered and the code within the callback processes the data.It extracts numeric values for
throttle,brakeand the phonesYaxis aka steering.These are combined with some additional synchronization data, into a new ParameterData object and published to the output topic (
car-game-input) -
Tag this version of the code by clicking the small tag icon at the top of the code window.
- Type
game-v1.0into the input box - Hit enter
- Type
Next you will deploy the code as a microservice.
Deploy
To deploy a microservice in Quix is a very simple three step process and step one isn't read the Kubernetes manual!
-
Click
Deploynear the top right hand corner of the screen. -
Select the
game-v1.0tag you created earlier -
Click
DeployYou will be redirected to the homepage and the code will be built, deployed and your microservice will be started.
Success
🚀 You've deployed the first microservice! Congrats!
What's actually happening
We built the code, created any missing topics and then deployed the compiled code into a Kubernetes pod running in our shared cluster.
Once started, the microservice is ready to handle any data streamed to the input topic.
Control
Now that you have the first service up and running it's time for the next one.
Follow the same process as above and deploy the Streaming Demo - Control application.
Remember the steps are:
-
Search the Code Samples for
Streaming Demo -
Select the
Streaming Demo - Controlapplication -
Save it to your environment.
-
Tag it
-
Deploy it
Success
🚀 You deployed another service and should now have two services in your data processing pipeline.
About the code
The code's main purpose is to listen for and respond in real-time to data and events being streamed to it via the car-game-input topic.
When data is received, the on_parameter_data_handler callback is immediately triggered and the code within the callback processes the data.
It extracts numeric values for throttle, brake and steering and uses these to determine the cars position on the track, it also slows the car if it goes off the track.
The cars updated x and y coordinates, speed and angle are then published to the output topic called car-game-control. The UI subscribes to this topic and keeps the car in the correct position.
UI
Now we can get to the user interface (UI). This will allow you to see the game board on your computer and see the controls on your phone. It's all linked together with Quix and a QR code.
You should be familiar with the process by now.
-
Search the Code Samples for
Streaming Demo -
Select the
Streaming Demo - UItile. -
Save it to your environment
-
Tag it
Make it public
This time before you click
Deploy, you'll need to make the deployment publicly accessible.This means making it available to the internet so your computer and phone can access it.
It's simple, just follow these steps:
- Click
PUBLIC ACCESS - Click the toggle switch to turn on public access
- Change the
URL prefixtogame-demo
- Click
-
Deploy it by clicking
Deploy
Build Time
It'll take a few minutes to build the UI for the demo. The build will download all the necessary packages, build and deploy the UI as well as opening up the firewall to allow your devices access.
Success
🚀 You deployed the UI to your environment and can now proceed to the fun part of the tutorial
About the code
This UI code is Javascript and HTML, it displays the track and car and subscribes to data coming from the topics to keep the car where it's supposed to be or at least where you drive it!
The most relevant part of the code is where WebSockets are used via Microsoft's SignalR.
For example these lines subscribe to various parameter values on the car-game-control topic.
    connection.invoke("SubscribeToParameter", "car-game-control", stream_id + "-car-game-input-control", "x");
    connection.invoke("SubscribeToParameter", "car-game-control", stream_id + "-car-game-input-control", "y");
    connection.invoke("SubscribeToParameter", "car-game-control", stream_id + "-car-game-input-control", "angle");
    connection.invoke("SubscribeToParameter", "car-game-control", stream_id + "-car-game-input-control", "speed");
And then when data is published for those parameters this code will handle it
    connection.on("ParameterDataReceived", data => {
        if (data.streamId.endsWith("-car-game-input-control")) { ... }
    }
Look for those lines in the create-page.js file and explore what they do.
For more about WebSockets see this page.
Fun
With the microservices for control and input processing deployed along with the UI we can move on to trying the game.
-
Click the
Streaming Demo - UItile on the home page -
Click the
Public URLin theDetailspanel on the leftA new tab will open and load the games first page.
-
Scan the QR code with your phone and follow the link
-
Ensure your phone is rotated either left or right depending on your device
-
Click the
STARTbutton on your phones screenNote
You might need to allow notifications (this is just for the buzzer/vibrate to work)
Note
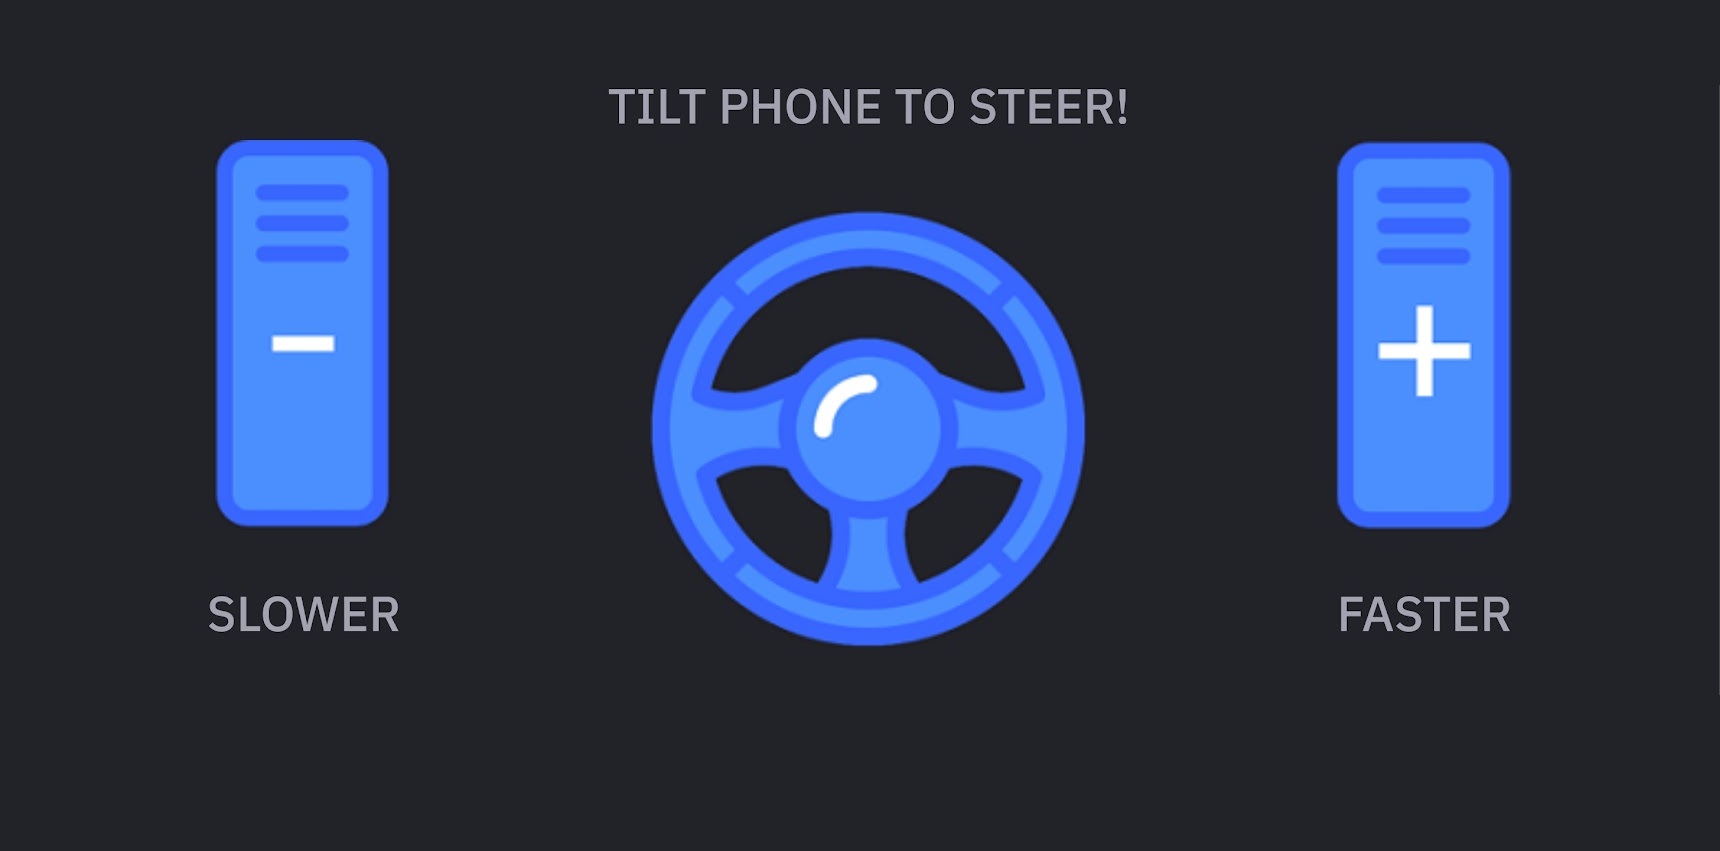
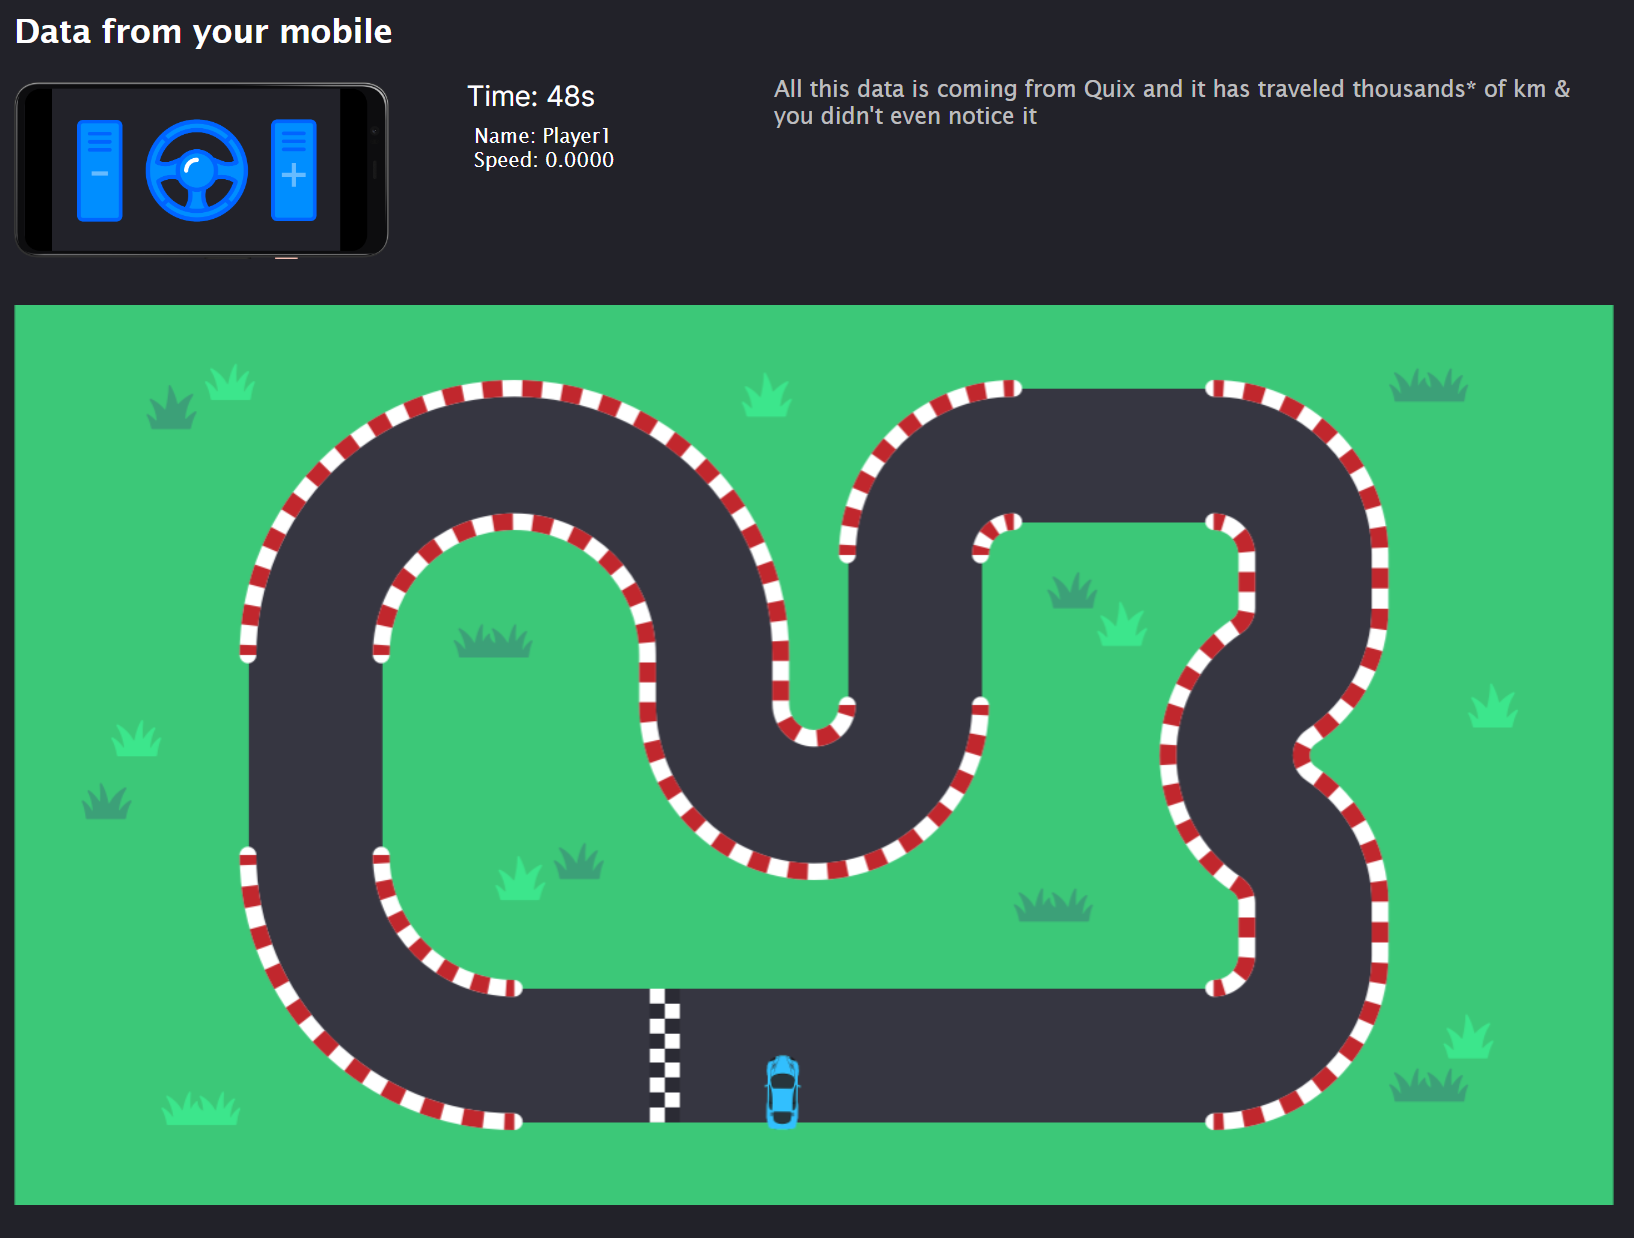
Notice that the page on your computer has also changed to the racing track.
You can now use your phone as a steering wheel to drive the car around the track.
-
DRIVE! 🏎️🏁
Phone screen
Game screen
Getting help
If you need any help, please sign up to the Quix Community.