How to send tabular time series data to Apache Kafka with Python and Pandas
Use Python to process time series data and send it to Apache Kafka. You'll use a large sample data set from an online-retailer and send the records in batches with Pandas and the kafka-python library.


About this tutorial
Time series data comes in all shapes and sizes and it’s often produced in high frequencies in the form of sensor data and transaction logs. It’s also produced in huge volumes where the records are separated by milliseconds rather than hours or days.
But what kind of system can handle such a constant stream of data? An older approach would be to dump the raw data in a Data Lake and process it in huge batches with a long-running process. Nowadays, many companies prefer to process the raw data in real time and write the aggregated results to a database.
For example, an online retailer could continuously aggregate transactional data by product and day rather than running expensive database queries on demand. But how would this work in practice? Let’s find out!
In this tutorial, we’ll use Python and Apache Kafka to process large volumes of time series data that comes from a real online retailer.
What you’ll learn
By the end of this tutorial you’ll understand:
- Why startups and online businesses use Apache Kafka
- The unique qualities of time series data and how it works with Kafka
- How to install and run Kafka on your local machine
- How to send time series data to Kafka in batches using Python and the Pandas library
What you should know already
This article is intended for data scientists and engineers, so we’re assuming the following things about you:
You know your way around Python and have used the Pandas library or at least know what it’s used for in data science.
You’ve heard of Apache Kafka and know roughly what it’s for.
But don't worry if you don’t meet these criteria. This tutorial is simple enough to follow along, and we’ll briefly explain these technologies. Just be aware that it’s not intended for absolute beginners.
Why use Apache Kafka for time series data?
Apache Kafka is an industry standard for processing data in real-time. You can use it to process a vast firehose of data (as long as you have the computing resources).
For example, some Formula One racing teams use Kafka in combination with Kubernetes to process huge quantities of sensor data coming in every millisecond. This data is analyzed in real-time to predict outcomes in races and to provide teams with insights for their Formula One drivers.
Aside from it’s ability to process data streams, there are other key reasons why an online business might choose to use Apache Kafka:
- Scalability: Kafka is designed to handle high volumes of data with low latency, making it well-suited for startups that expect rapid growth and need a solution that can scale with them.
- Decoupling: Ever heard of event-driven architectures? Kafka is one of the tools often touted to facilitate this pattern. It allows for decoupling of systems, meaning that different parts of the architecture can be developed and deployed independently. This can be particularly useful for startups that are iterating rapidly and need to be able to make changes to their systems without impacting other parts of the architecture.
- Durability: Kafka stores all published messages for a configurable amount of time, which means that it can serve as a durable log of all the data that has passed through the system.
- Wide adoption: Apache Kafka is widely adopted in the industry, which means that it has a large user base and a strong ecosystem of tools and resources available. This can be very helpful for startups that want to leverage the collective experience of the Kafka community.
That last point is especially critical, since Apache Kafka has a notoriously steep learning curve. Without a vast pool of tutorials and demos, many beginners would struggle to get it up and running.
Why use Python with Apache Kafka?
Because Python is the most popular language in the Data and ML communities. These communities could benefit a lot from Apache Kafka, but there aren't yet enough Kafka tutorials that appeal to their skillset.
If you’re part of a data team, you’re more likely to know Python and Pandas than you are Java. Yet most older Kafka tutorials are written for software engineers who write in Java. This is because software engineers have traditionally built the components that interact with Kafka (and Kafka itself is written in Java/Scala).
Kafka’s user base is changing however. The responsibilities of software and data teams are beginning to converge. This has been driven by the growing importance of data in modern organizations and the increasing complexity of data management and processing tasks. Today, data professionals also contribute to software components that interact with Kafka—but they still encounter a lot of friction because they’re typically not familiar with technologies from the Java ecosystem. That’s why we’re using Python and Pandas in these examples.
Ok, that’s it for the preamble - lets get into the tutorial.
Prerequisites for this tutorial
The first thing you need is time—about 30 minutes (once you have the required software installed).
Speaking of which, make sure that you have the following software installed before you proceed any further.
Major steps
Before we get into the details, let’s go over the major steps that we’ll be covering.
- Setting up Kafka: We’ll first get to grips with Kafka’s command line tools, and use them to:
— Start the Zookeeper and Kafka server
— Create a topic (where we’ll be sending our data)
- Analyzing the Data: Use Python and Pandas to:
— Take a closer look at the structure of the online retail data set.
— Read it into a dataframe and understand the different data types.
We’ll also look at the benefits of using data frames and time series data with Kafka.
- Sending Data to a Kafka with a Producer: Use the kafka-python library to:
— Read the csv into a Data Frame and initialize the Kafka python producer.
— Iterate through the rows and send them in batches to Kafka
- Read Data from Kafka with a Consumer: Again, we’ll use the kafka-python library to:
— Read the messages from our Kafka topic
— Take the batched message and convert it back into a data frame.
— Perform some simple aggregation on it.
You’ll find the code in the ‘tabular-timeseries-kafka’ subfolder. If you want to jump straight ahead to the code, you can clone our tutorials repo in GitHub with the following command:
git clone https://github.com/quixio/tuto...
Setting up Apache Kafka
If you haven’t done so already, download Apache Kafka from the Apache Kafka Download page (for example, “kafka_2.12-3.3.1.tgz”) and extract the contents of the file to a convenient location.
Before you can do anything with Kafka, you have to start the core services. Each of these services needs to run in a separate terminal window. These two services are:
- The zookeeper service which is responsible for managing the coordination between all the different services, brokers, and clients that make up the Kafka cluster.
- The Kafka server service which runs the core functionality of Apache Kafka, such as the message broker.
When following these instructions, start each terminal window in the directory where you extracted Kafka (for example, “C:\Users\demo\Downloads\kafka_2.13-3.3.1\ ”)
To start the core Kafka services, follow these steps:
1. In the Kafka directory, open a terminal window and start the zookeeper service with the following command:
- Linux / macOS
bin/zookeeper-server-start.sh config/zookeeper.properties
- Windows
bin\windows\zookeeper-server-start.bat .\config\zookeeper.properties
- You should see a bunch of log messages indicating the server started successfully.
Leave the window open.
2. Open a second terminal window and start the Kafka server with the following command:
- Linux / macOS
bin/kafka-server-start.sh config/server.properties
- Windows
bin\windows\kafka-server-start.bat .\config\server.properties
- Again, you should see a bunch of log messages indicating the server started successfully and connected to the Zookeeper server. Also leave this window open.
3. Next, you'll need to create a topic called "transactions" to store the data.
- If the term “topic” is unfamiliar, think of it as a process that is constantly updating a log file. There are many ways to explain what a topic does in detail, but for now, let’s just say that it’s a log file for events related to a specific type of data (such as, incoming transactions) including the data itself.
To create a topic:
Open a third terminal window and enter the following command:
- Linux / macOS
bin/kafka-topics.sh --create --topic transactions --bootstrap-server localhost:9092
- Windows
bin\windows\kafka-topics.bat --create --topic transactions --bootstrap-server localhost:9092
- You should see the confirmation message “Created topic transactions”
That’s it for Kafka. Hopefully you’ve managed to set it up without any hassle. If you ran into any issues, this troubleshooting guide might help. Now, let’s move in to the exciting part.
Analyzing the data
For this exercise, we’ll be using a transnational data set which contains all the transactions occurring between 01/12/2010 and 09/12/2011 for a UK-based online retail store. It was obtained from the machine learning repository hosted by the University of California.
To prepare, follow these steps:
- Create a folder for this project (e.g. “tabular-timeseries-kafka”).
- Download the zipped CSV file from this storage location and extract it into the project folder
We’ll be providing instructions as Python commands, but you can also use an IDE such as Pycharm Community Edition.
This first task is to inspect the data in the file and look at how Pandas interprets the data by default:
To inspect the data follow, these steps:
1. Open a terminal window in your project directory and enter python start the Python console.
2. Read the CSV into a DataFrame by entering the following commands:
>>> import pandas as pd
>>> df = pd.read_csv("online_retail_II.csv", encoding="unicode_escape")
>>> print(df.info())
3. Examine the output of df.info:
RangeIndex: 1067371 entries, 0 to 1067370
Data columns (total 8 columns):
# Column Non-Null Count Dtype
--- ------ -------------- -----
0 Invoice 1067371 non-null object
1 StockCode 1067371 non-null object
2 Description 1062989 non-null object
3 Quantity 1067371 non-null int64
4 InvoiceDate 1067371 non-null object
5 Price 1067371 non-null float64
6 Customer ID 824364 non-null float64
7 Country 1067371 non-null object
dtypes: datetime64[ns](1), float64(2), int64(1), object(4)
memory usage: 65.1+ MB
Note that the InvoiceDate column has been read in as an object data type.
In Pandas, the object data type is used to represent string values or data that cannot be easily cast to a numerical data type.
To make this a true time series dataset, we need to have the time that the record was created (in this case InvoiceDate) in a proper DateTime format. We’ll explain why in a moment.
To convert the InvoiceDate column into a date format:
- In the Python console, enter the following commands:
>>> df['InvoiceDate'] = pd.to_datetime(df['InvoiceDate'])
>>> df.set_index('InvoiceDate', inplace=True)
This conversion allows you to take advantage of pandas' extensive time series functionality.
For example, setting it as a DatetimeIndex can help you optimize your time series data with precomputed and cached date ranges; fast and easy selection of dates, date ranges, and the values attached to them; and quick summarizations using time blocks ("year", "month").
What Kafka can do with time series data
So we know that Pandas has many time series-related features, but what about Kafka? Indeed, Kafka also provides a number of features that can be used to optimize the processing of time series data. These include:
- Compression: Kafka supports multiple compression algorithms that can reduce the size of data streams and improve the efficiency of data processing.
- Data partitioning: Kafka allows you to partition data streams by key to distribute data processing across multiple consumer instances.
- Custom serialization: Kafka provides a pluggable serialization framework that allows you to specify custom serializers and deserializers for your data, which can be useful for optimizing the performance of data processing.
Note that we’re not going to use any of these features in this basic tutorial. But if you intend to use Kafka in production, it’s important to understand the role that time data can play when interacting with Kafka.
The advantages of using DataFrames with Kafka
Pandas DataFrames are particularly useful when storing data in a tabular format, as each feature of your data set can be manipulated as a one-dimensional shape or Series while still collectively forming a multidimensional data set. DataFrames also come with a number of handy built-in functions that allow you to manipulate the data and process data very quickly.
For example, in the next major step, we’ll be sending the data in batches. We’re batching the records to replicate a production scenario where you might receive hundreds of records a second.
If you sent a message to kafka for each individual record, you could risk bottlenecks or system failures. That’s why you send small batches of data in each message at a lower frequency (rather than tons of small messages at a high frequency).
As you’ll see, this process is very easy when we use the Pandas chunking feature.
Creating a Kafka Producer to send the data
Now, lets put what we’ve learned into a proper Python file and start sending data to Kafka. We’ll be using the kafka-python library which is one of several libraries intended to connect python applications to Kafka (another is the confluent-kafka-python library).
To create a producer, follow these steps:
1. In your project directory, create a file called producer.py and insert the following code block:
view raw timeseries_kafka_create_producer_1.py hosted with ❤ by GitHub
This imports all the required libraries and initializes the Kafka producer, telling it to connect to the server that you should (hopefully) still have running on your computer under ‘localhost’
2. Next, add the ‘for’ loop that will iterate through the file and send the data in batches:
view raw timeseries_kafka_create_producer_2.py hosted with ❤ by GitHub
The code includes explanatory comments, but essentially it’s doing the following:
- Reading the CSV in batches of 10 rows
- Serializing each batch into JSON and encoding the JSON as a Byte array
- Sending that JSON as a message to the Kafka topic “transactions”
You can review the complete file in our Github repository. https://github.com/quixio/tutorial-code/blob/main/tabular-timeseries-kafka/producer.py
3. Save your file and run your code with the following command:
python producer.py
- In your terminal window, you should start seeing confirmations like this:
“Sent record to topic at time 2022-12-28 13:23:52.125664” for each message sent. - If you get an error about missing modules, make sure that you have the kafka-python library installed (pip3 install kafka-python).
Once the data is in the Kafka topic, it can be read by multiple consumers and extracted for more downstream processes.
Lets create a consumer to read those messages back in and before a basic operation on them.
Creating a Kafka Consumer to read the data
The process for creating a Kafka consumer is very similar to the previous step. In this case we’ll be, reading each batched message, converting it back into a DataFrame.
We’ll pretend that this is consumer is for some kind of inventory analysis pipeline that only wants to know the total sales for each stock item. Thus, in the data, we’ll only look at the StockCode, the Quantity sold and the Price. We’ll calculate the total value of the sale for each record so that we can aggregate sales by StockCode.
1. In your project directory, create a file called consumer.py and insert the following code block to initialize the consumer.
view raw timeseries_kafka_create_consumer_1.py hosted with ❤ by GitHub
- We’re initializing the consumer with a few more options than we did for the producer.
- First, we’re telling it what topic to read from, then where the Kafka server is running, and thirdly, we’re giving it a lambda function to use for deserializing the message values back into a Python dictionary.
2. Next, add the ‘for’ loop that will iterate through the messages and perform some processing on them.
view raw timeseries_kafka_create_consumer_2.py hosted with ❤ by GitHub
- As you can see in the code comments, we are performing a simple calculation that outputs a summary of the revenue by StockCode for each message batch.
- Of course, the end goal would be to keep a running total of the overall revenue by StockCode. This would require some further processing that would write the aggregations into a database which could in turn, power some kind of Dashboard.
- However, for the purposes of this tutorial, this is a good place to stop. If everything works correctly, you should see the aggregated result logged for each message. It should look something like this:
Name: revenue, dtype: float64
StockCode
16161P 10.50
16169N 10.50
21491 11.70
22065 17.40
22138 44.55
22139 44.55
22352 30.60
85014A 17.85
85014B 17.85
85183B 144.00
If you see the logged aggregations, well done! Congratulations for making it to the end.
Wrapping up
This process might seem unremarkable if you’re just doing it on your local machine, but it becomes more interesting when you consider how this pattern could scale. Let’s take a moment to recap what you did—you accomplished two key tasks:
1. You produced a high-frequency stream of messages and streamed them into a Kaka topic
In this case, you were “replaying” a historical log of customer transactions and artificially staggering each message by half a second.
How it could scale:
- In production, it would be some kind of storefront web app that is producing the stream and we would have to do a bit of extra routing to get it into the topic (because the storefront and the Kafka cluster would live on different servers).
- The messages might also be coming in at irregular frequencies rather than a standard half second, and the serialization would be optimized in some way.
2. You consumed a high-frequency stream of messages from a Kaka topic and performed an aggregation on the data
For the tutorial, you just streamed and consumed the data on the same machine, which might seem like nothing special—but in reality, there would be many consumers of different machines.
How it could scale:
- You could run a whole array of applications on different servers, each consuming the stream in different ways.
- One consumer could be a fraud detection application that reads transactions and looks at suspicious transaction patterns.
- Another consumer could be an order fulfillment pipeline that is only interested in the latest unfulfilled orders. It would read the new messages and send the orders for processing.
- Yet another consumer could be a data aggregation pipeline that would enrich the data with data from a CRM and put it in a data warehouse for the marketing team to analyze.
As you can see, high-frequency time series data can be incredibly powerful when you use Apache Kafka to harness it. Tabular time series data is common in many applications such as financial analysis, sensor data analysis, and social media analytics.
By following the steps outlined in this tutorial, you should now have a solid foundation for sending tabular time series data to Apache Kafka and leveraging its capabilities to perform real-time data processing and analysis. Whether you are working on a small scale or a large scale project, Apache Kafka is an essential tool to have in your toolkit, and hopefully we’ve brought you one tiny step closer to mastering it.
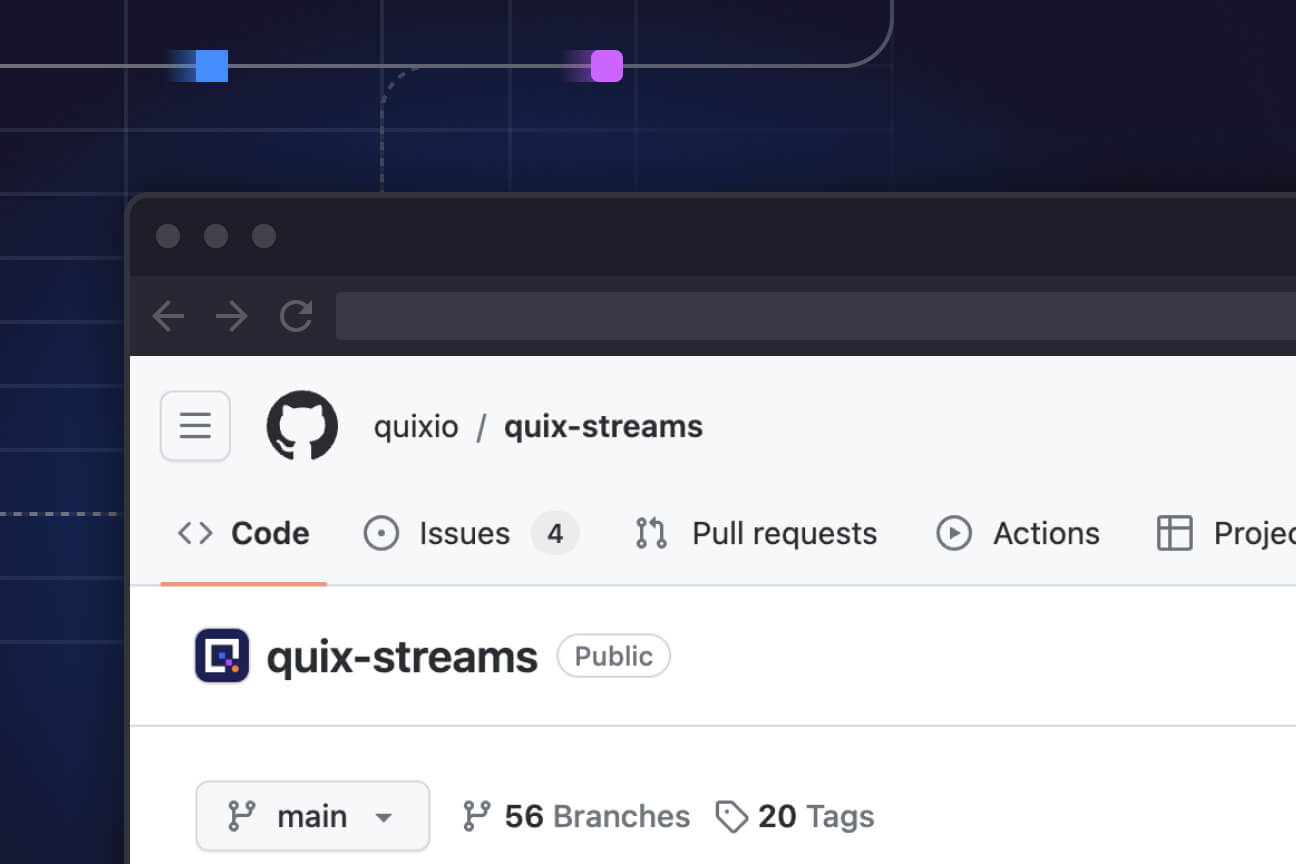
- You can find the source code for this and other tutorials in our tutorials GitHub repository.
What’s a Rich Text element?
The rich text element allows you to create and format headings, paragraphs, blockquotes, images, and video all in one place instead of having to add and format them individually. Just double-click and easily create content.
Static and dynamic content editing
A rich text element can be used with static or dynamic content. For static content, just drop it into any page and begin editing. For dynamic content, add a rich text field to any collection and then connect a rich text element to that field in the settings panel. Voila!
How to customize formatting for each rich text
Headings, paragraphs, blockquotes, figures, images, and figure captions can all be styled after a class is added to the rich text element using the "When inside of" nested selector system.
Tomas Neubauer is Co-Founder and CTO at Quix, responsible for the direction of the company across the full technical stack, and working as a technical authority for the engineering team. He was previously Technical Lead at McLaren, where he led architecture uplift for Formula One racing real-time telemetry acquisition. He later led platform development outside motorsport, reusing the knowhow he gained from racing.
Check out the repo
Our Python client library is open source, and brings DataFrames and the Python ecosystem to stream processing.
Interested in Quix Cloud?
Take a look around and explore the features of our platform.
Interested in Quix Cloud?
Take a look around and explore the features of our platform.